A step-by-step guide on how to onboard a Dual Pricing Merchant Account.
Prerequisites
Your user will need to have the 'zero:merchant:create' and 'zero:merchant:update' (Manage merchant accounts) permissions to be able to board new merchant accounts; this also applies to your agents so they can board new merchant accounts under their portfolio. Primary users have this permission set by default and it cannot be removed.
How to Onboard a Dual Pricing Merchant Account
1. Log in to your Partner Portal and head over to Merchants → New Merchant.
General
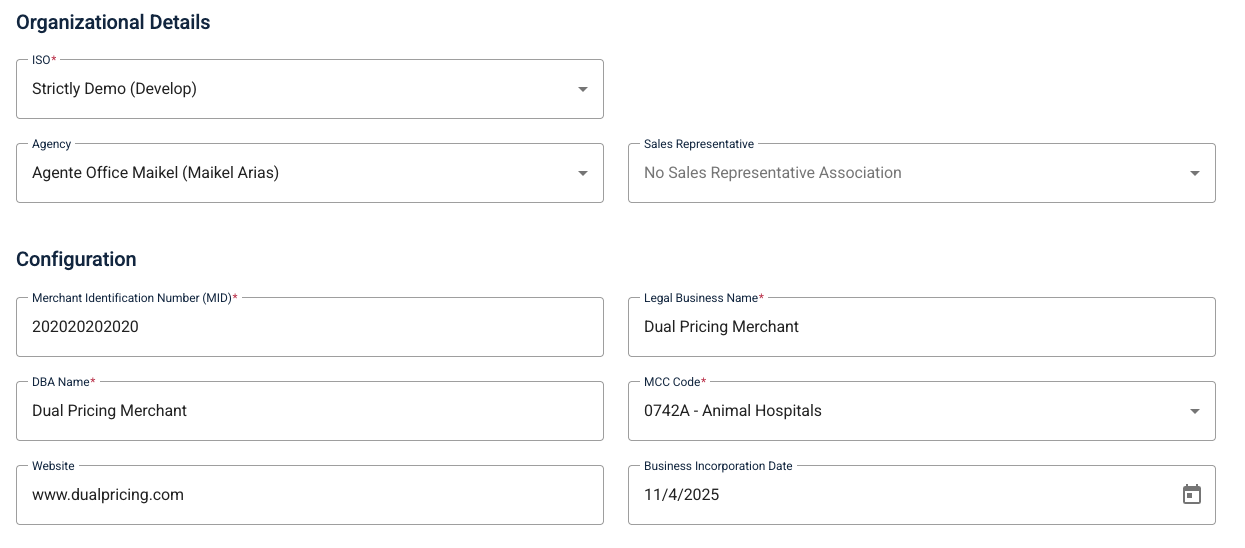
2. Select your Organizational Details, ISO and Agent Office.
3. Enter the merchant's configuration:
- The MID assigned to merchant by processor.
- The Legal Business Name.
- The DBA Name entered here will be what the merchant sees when they log in to their portal.
- Select the Merchant Category Code (MCC) - generally, the MCC code will be on VAR sheets, if not, the merchant will need to contact their credit card processor to disclose the MCC code that’s been assigned to their business.
- MCC codes are determined based on the merchants business type and the products or services they provide. A MCC is assigned to a merchant by the card company when the business first starts accepting cards as a form of payment.
- Enter the business website. If there is no website created, leave it in blank.
- Enter the "Business Incorporation Date". This is the date when the business was officially registered.
4. Select your Localization Details, Timezone and Currency.

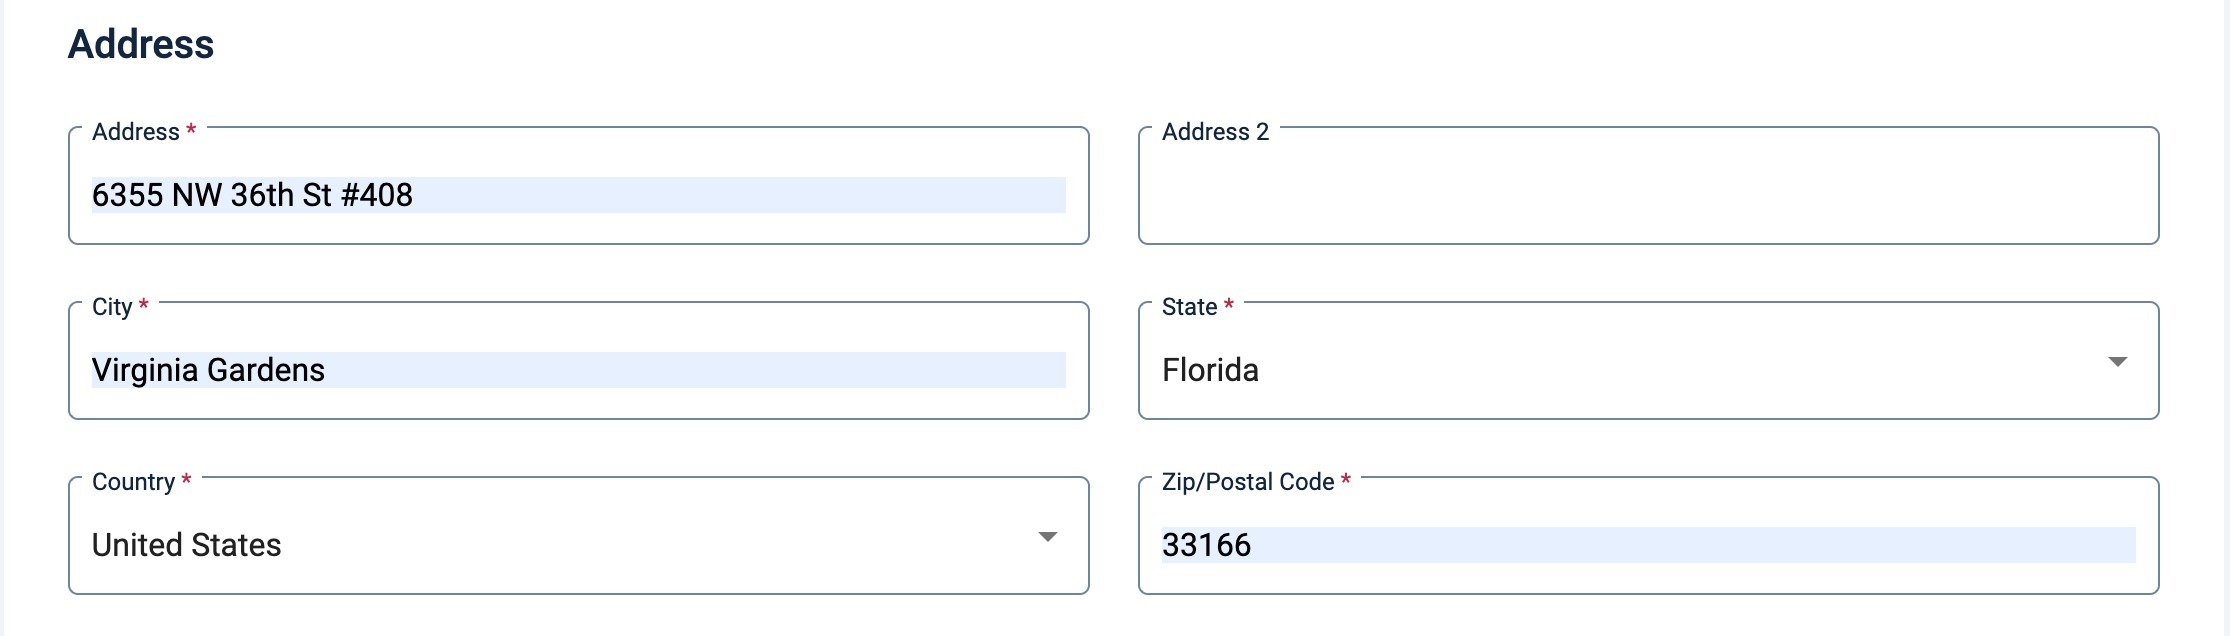
5. Enter merchant Address information.
6. The company contact will be the primary contact for your merchant; the email address entered here will receive the welcome email once boarding is completed.
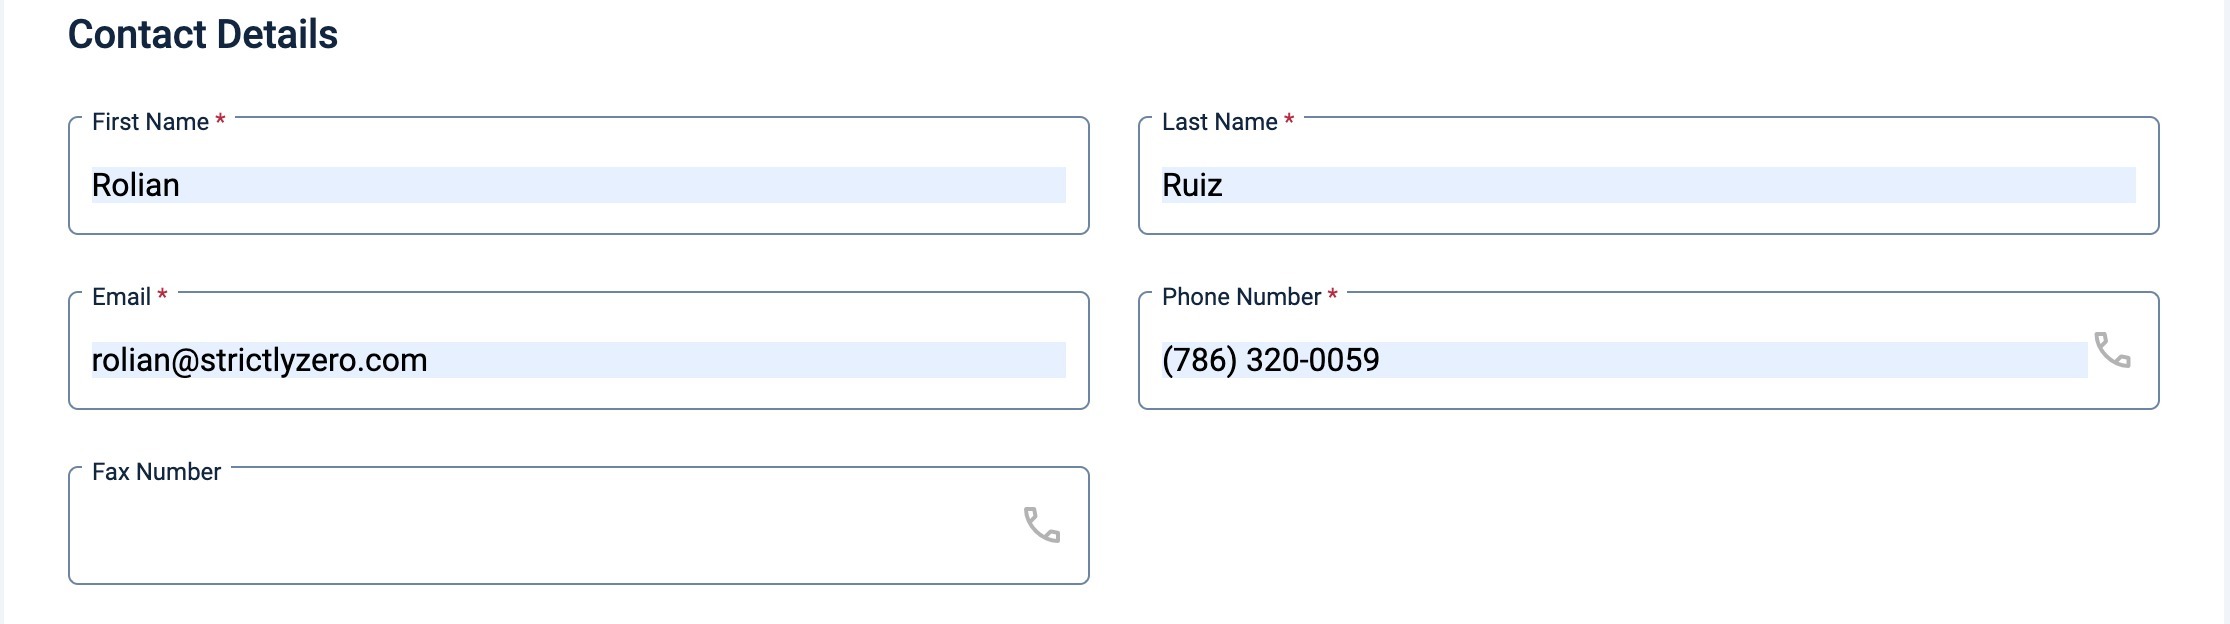
7. Enter the support's configuration:
- Email information, so customer can contact merchant directly via Email.
- Phone Number information, so customer can contact merchant directly via Phone Call.

8. Once all the * fields are completed, you may click Next.
Processing Services
9. Select Merchant Account Type "Dual Pricing"

10. Enable processing services. These are the methods used for processing. Note that as of right now, Card is required and enabled by default. You can also activate the rest and complete the configuration for it contracted, such as ACH, Cash, Electronic Checks, among others.
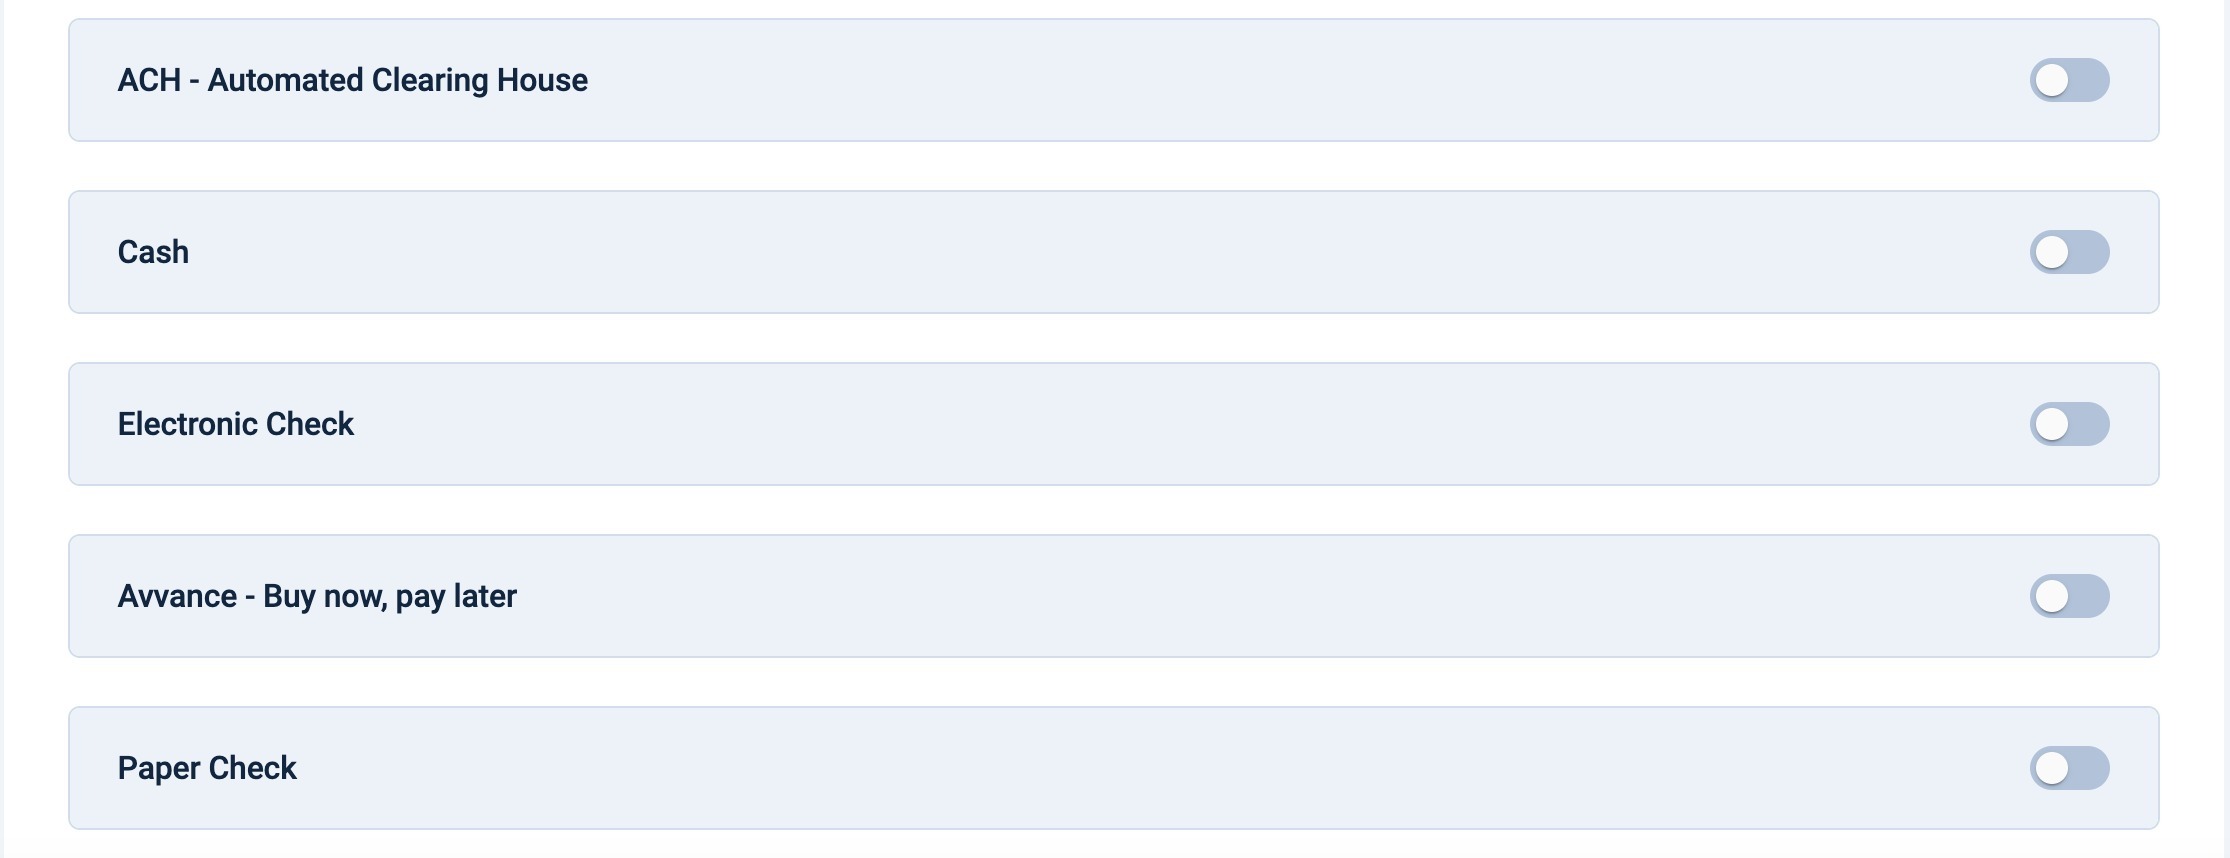
Let's go over the configurations for Card processing:
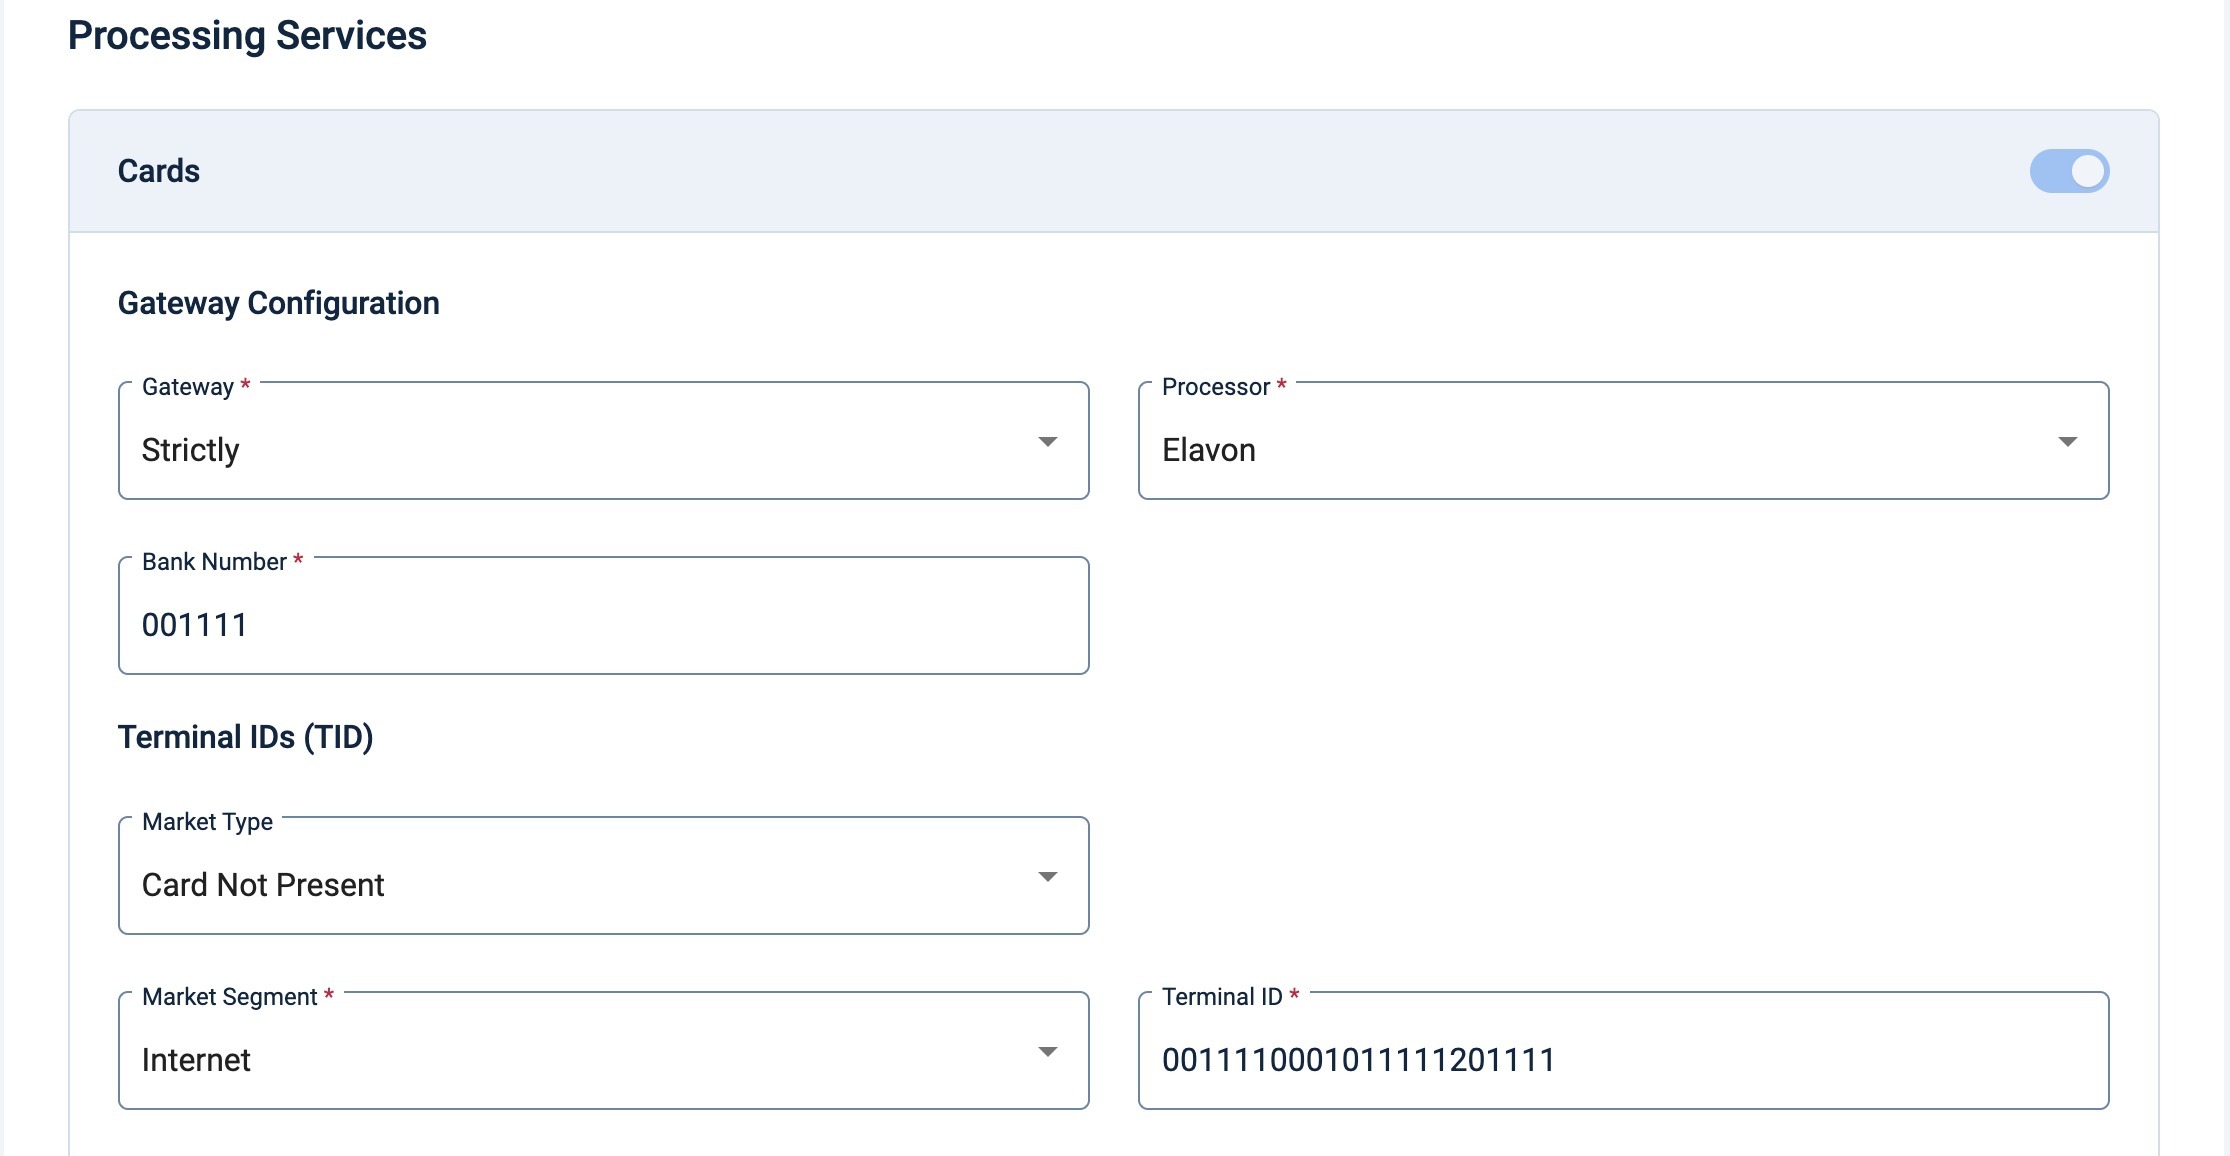
11. Select the Gateway processing platform that your merchant is using from the dropdown (if you do not see the processor in your Processing Services list, send a request to our support team to have it added to your account, please provide your ISO ID and MID with your request).
- Each processor will have their own specific boarding requirements under the Processor Information section. This section is where you will need the VAR sheet (also known as Tear sheet or Parameter sheet) from the Processor for US/CA boarding's.
- For more information on specific US/CA processors, please see Credit Card Processor Onboarding & Requirements.
12. Specify the Processor Rates:
- Processing Program: Defines the rate structure and fee rules applied to transactions. It determines how the gateway processes payments, including markup fees, network fees, and surcharge configurations.
- Strictly Managed – A predefined program where rates and fees are managed by the platform or gateway provider. Merchants do not have direct control over rate adjustments.
- Processor Managed – A predefined program where rates and fees are managed by the processor. Platform or Merchants do not have direct control over rate adjustments.
- MPP: The MPP (Merchant Pricing Plan) determines how the merchant is charged for transactions, including surcharge models, cash discount programs, and other fee structures.
- Custom: Allows the ISO to manually set their transaction rates, fees structures based on agreements with the processor.
- Credit Rate: Fee charged by the processor for processing credit card transactions. Percentage of the transaction amount.
- Debit Rate: Fee charged by the processor for processing debit card transactions. Percentage of the transaction amount.
- Debit per Item: Fee charged by the processor for each debit card transaction processed, irrespective of transaction size.
- Commercial Debit Rate: Fee charged by the processor for processing commercial debit card transactions. Percentage of the transaction amount.
- Commercial Debit per Item: Fee charged by the processor for each commercial debit card transaction processed, irrespective of transaction size.
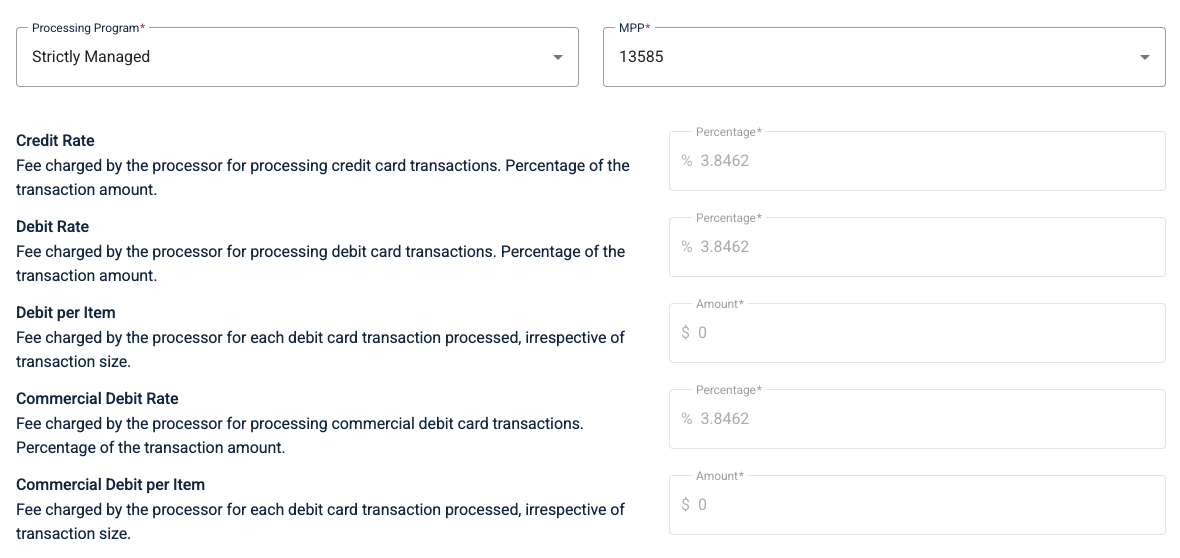
13. Enter the front Strictly Platform Rates. This is the percentage used to define the price when payments are completed using Card as the payment method.

14. Enter the "Charcheback per Item", which is the charged by the processor for each chargeback transaction processed, irrespective of transaction size.

15. Check of the Card Types (Debit / Credit) your merchant will accept under Payment Types Allowed. Keep in mind the processor will need to have the card scheme configured on their side as well. Note - in the US, UnionPay runs over Discover rails, therefore any processor that supports Discover would support UnionPay.

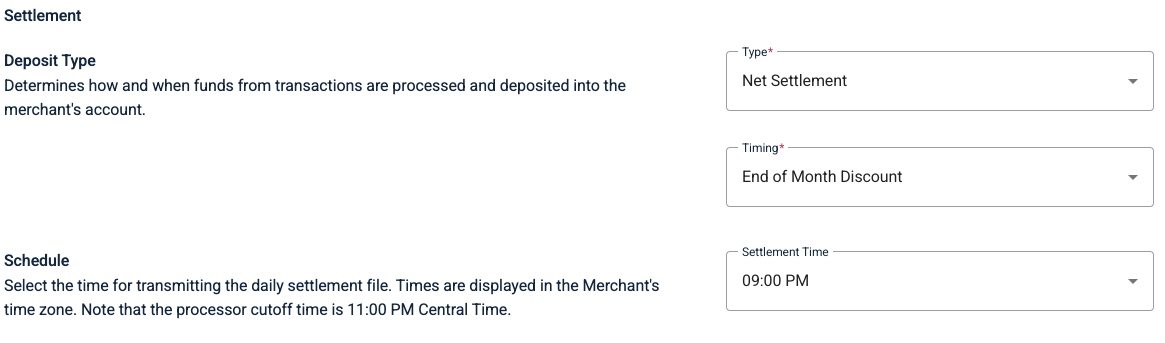
16. Complete the settlement details as per your business needs.
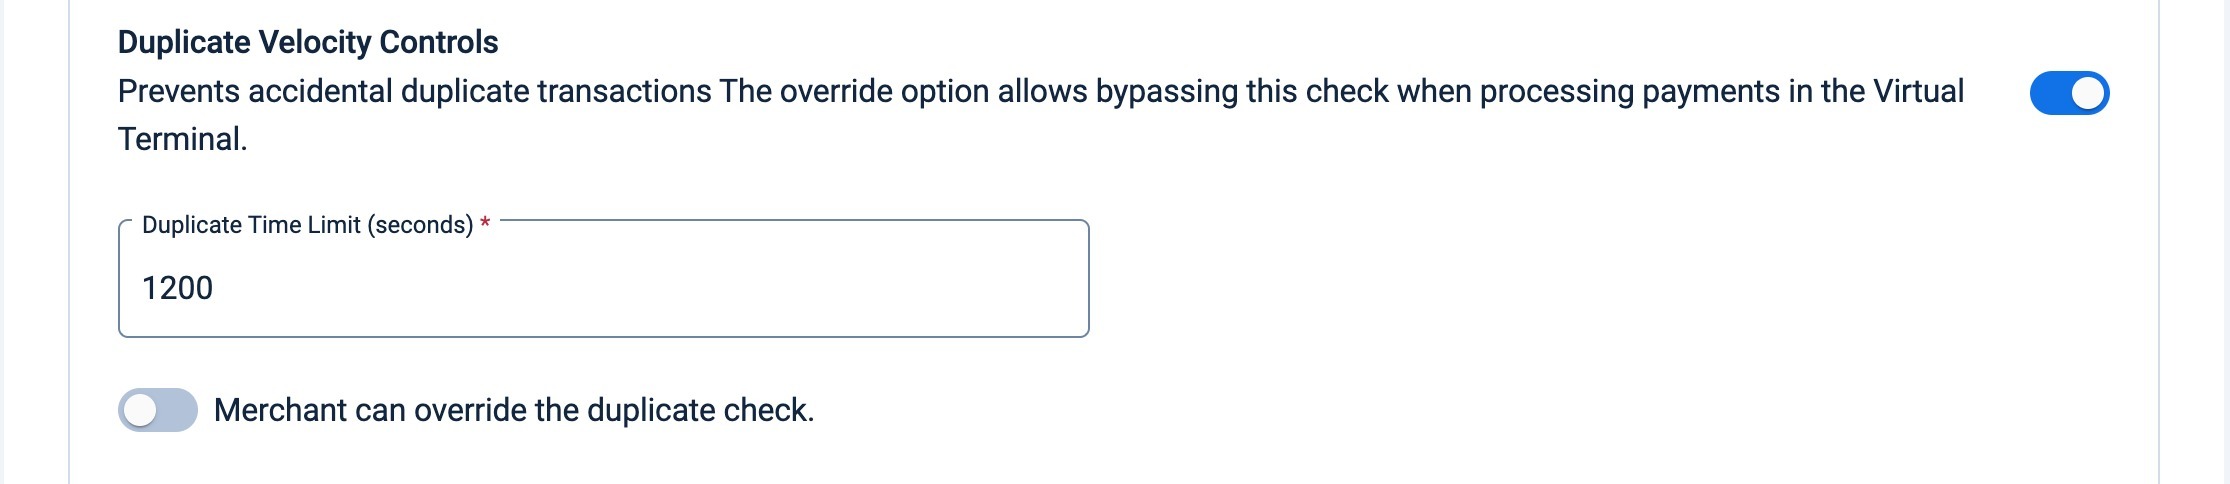
17. Duplicate Velocity Controls - if duplicate checking is enabled, it will prevent a customer from accidentally submitting the same transaction multiple times. This will check for the same card number and the same amount in the time frame you set in the Duplicate Time Limit field (in seconds). The default duplicate time limit is set to 1200 seconds (20 minutes). You can always come back to this step to turn it off if needed.
- By checking on Merchant can override the duplicate check, this will allow the merchant to ignore this check on a per transaction basis in the merchant’s Virtual Terminal page. They will have the option to check 'Disable Duplicate Check' before hitting the charge button.
18. Once all the * fields are completed, you may click Next.
Modules
19. Enable the required modules; Virtual Terminal, Payment Links, Invoices, Embedded Payments, Orders, Recurrent Payments, Terminals. Note that for the use of certain features the merchant might be billed at the end of the month.
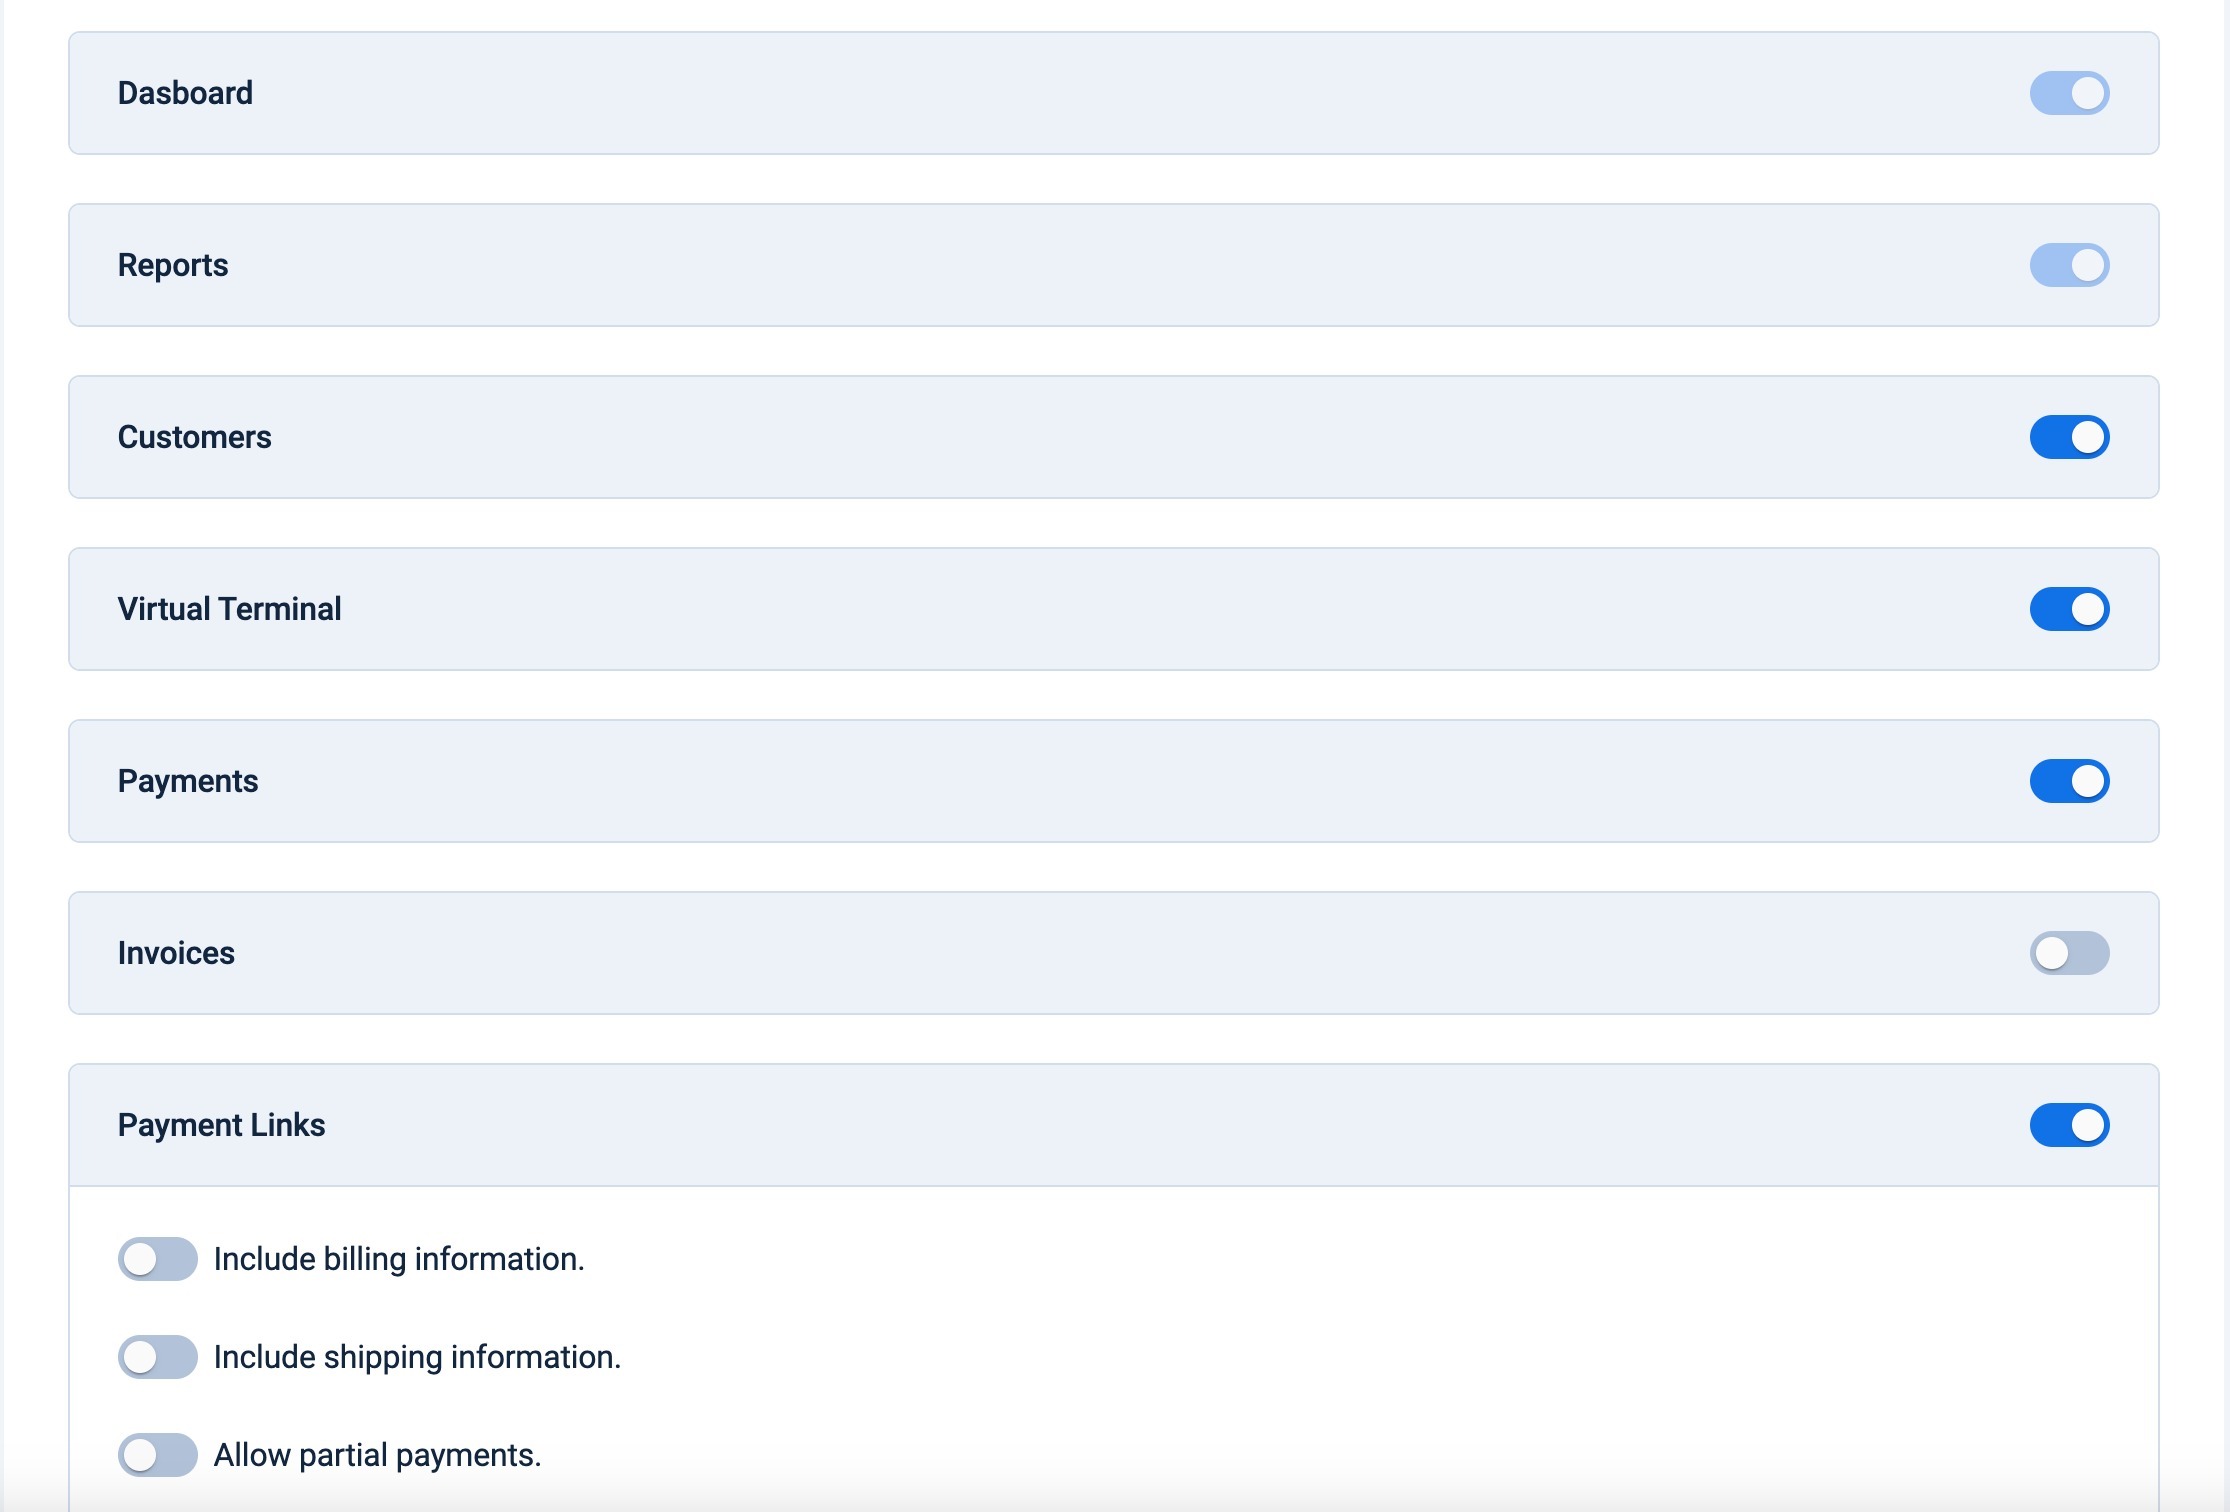
20. Once all the * fields are completed, you may click Next.
Custom Configurations
21. Enables Custom Fields and specify the modules you would like to append this new records; Payments, Invoices, Payment Links, Subscriptions and Terminals.
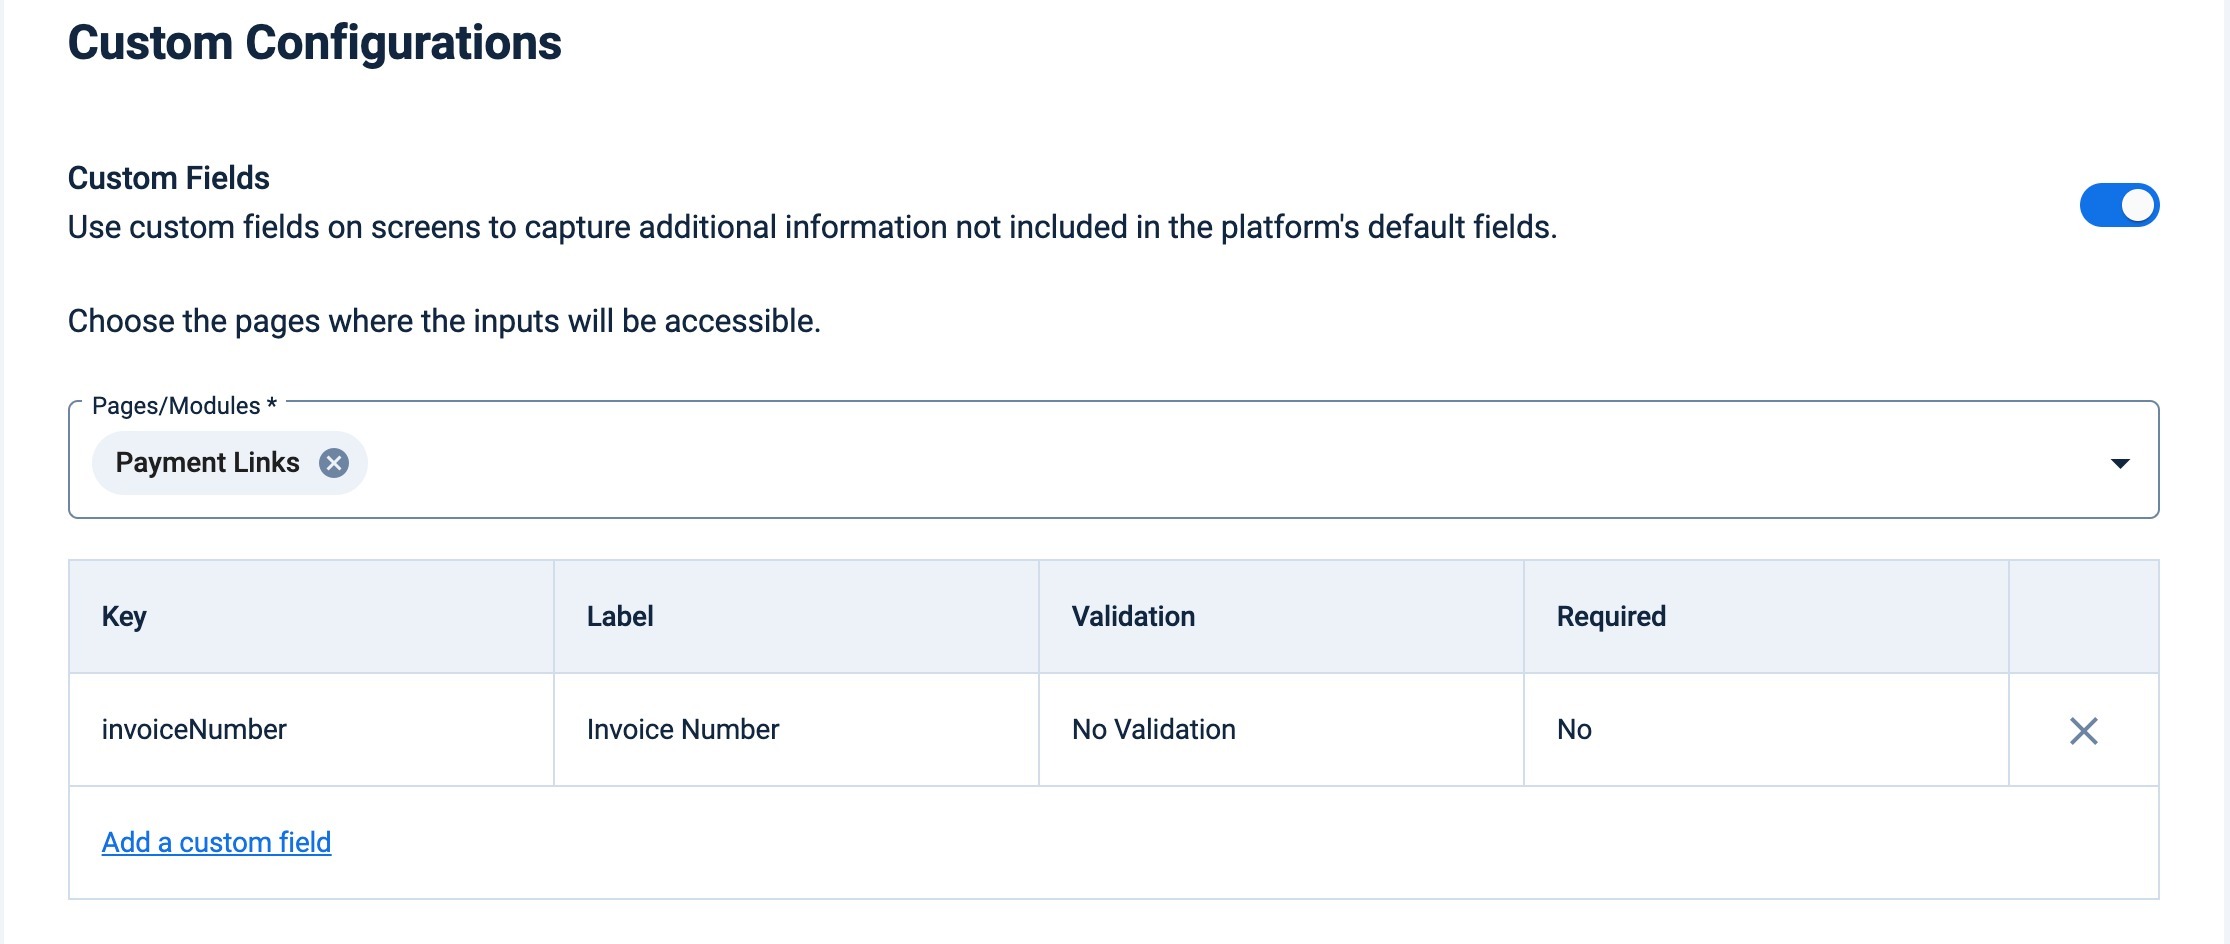
22. Once all the * fields are completed, you may click Next.
Billing
23. Enter their Bank Account information - this is applicable to US partners and partners who are set to Bill to Merchant.

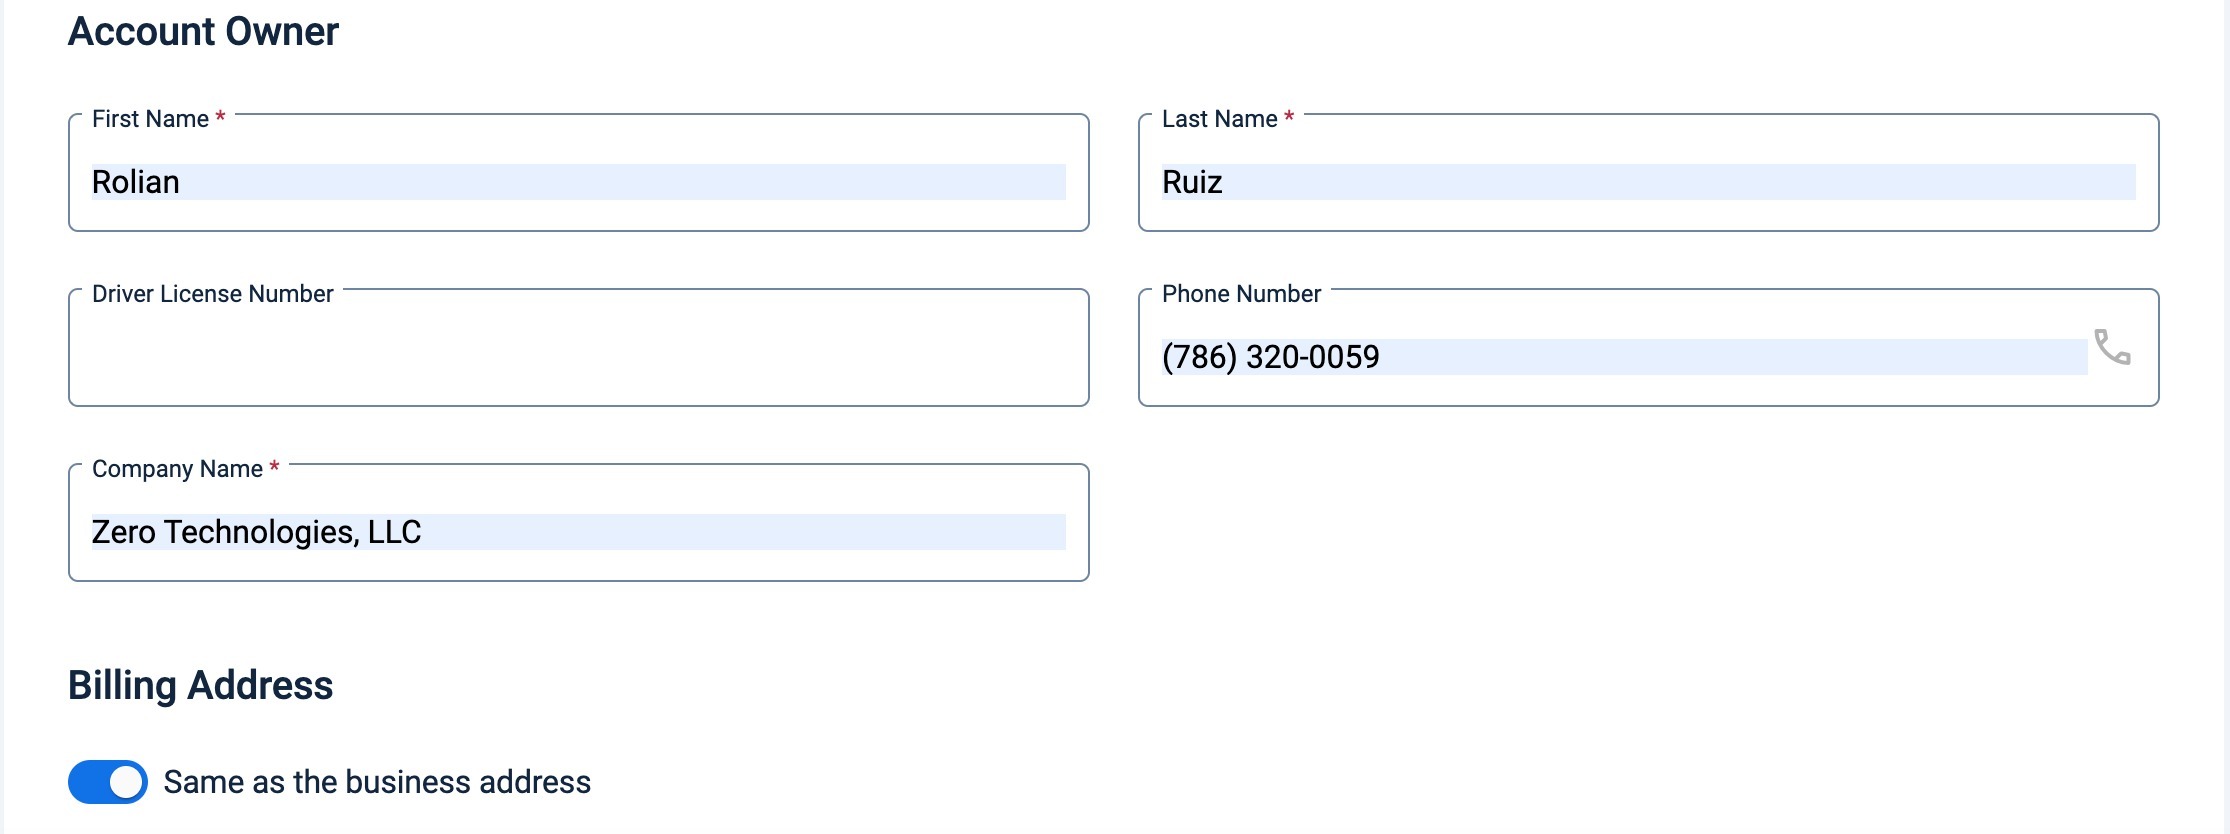
24. Enter the Account Owner personal infromation, such as First Name, Last Name and Driver License (Optional).
25. Enter The Billing Address, if different from business address.
26. Review the pricing table. This table shows the pricing of the features according to the merchant configuration. Based on this parameters, the billing at the end of the month will be executed.
27. Once all the * fields are completed, you may click Next.
Review
28. Next you will see a summary of the merchant account for review that you've created. This will give you the chance to edit any typos or errors prior to activating the Account and sending the Merchant Welcome Email.
29. The account will be saved, which you can always come back to your list of accounts when you are ready to send the email out to the merchant and activate their account.
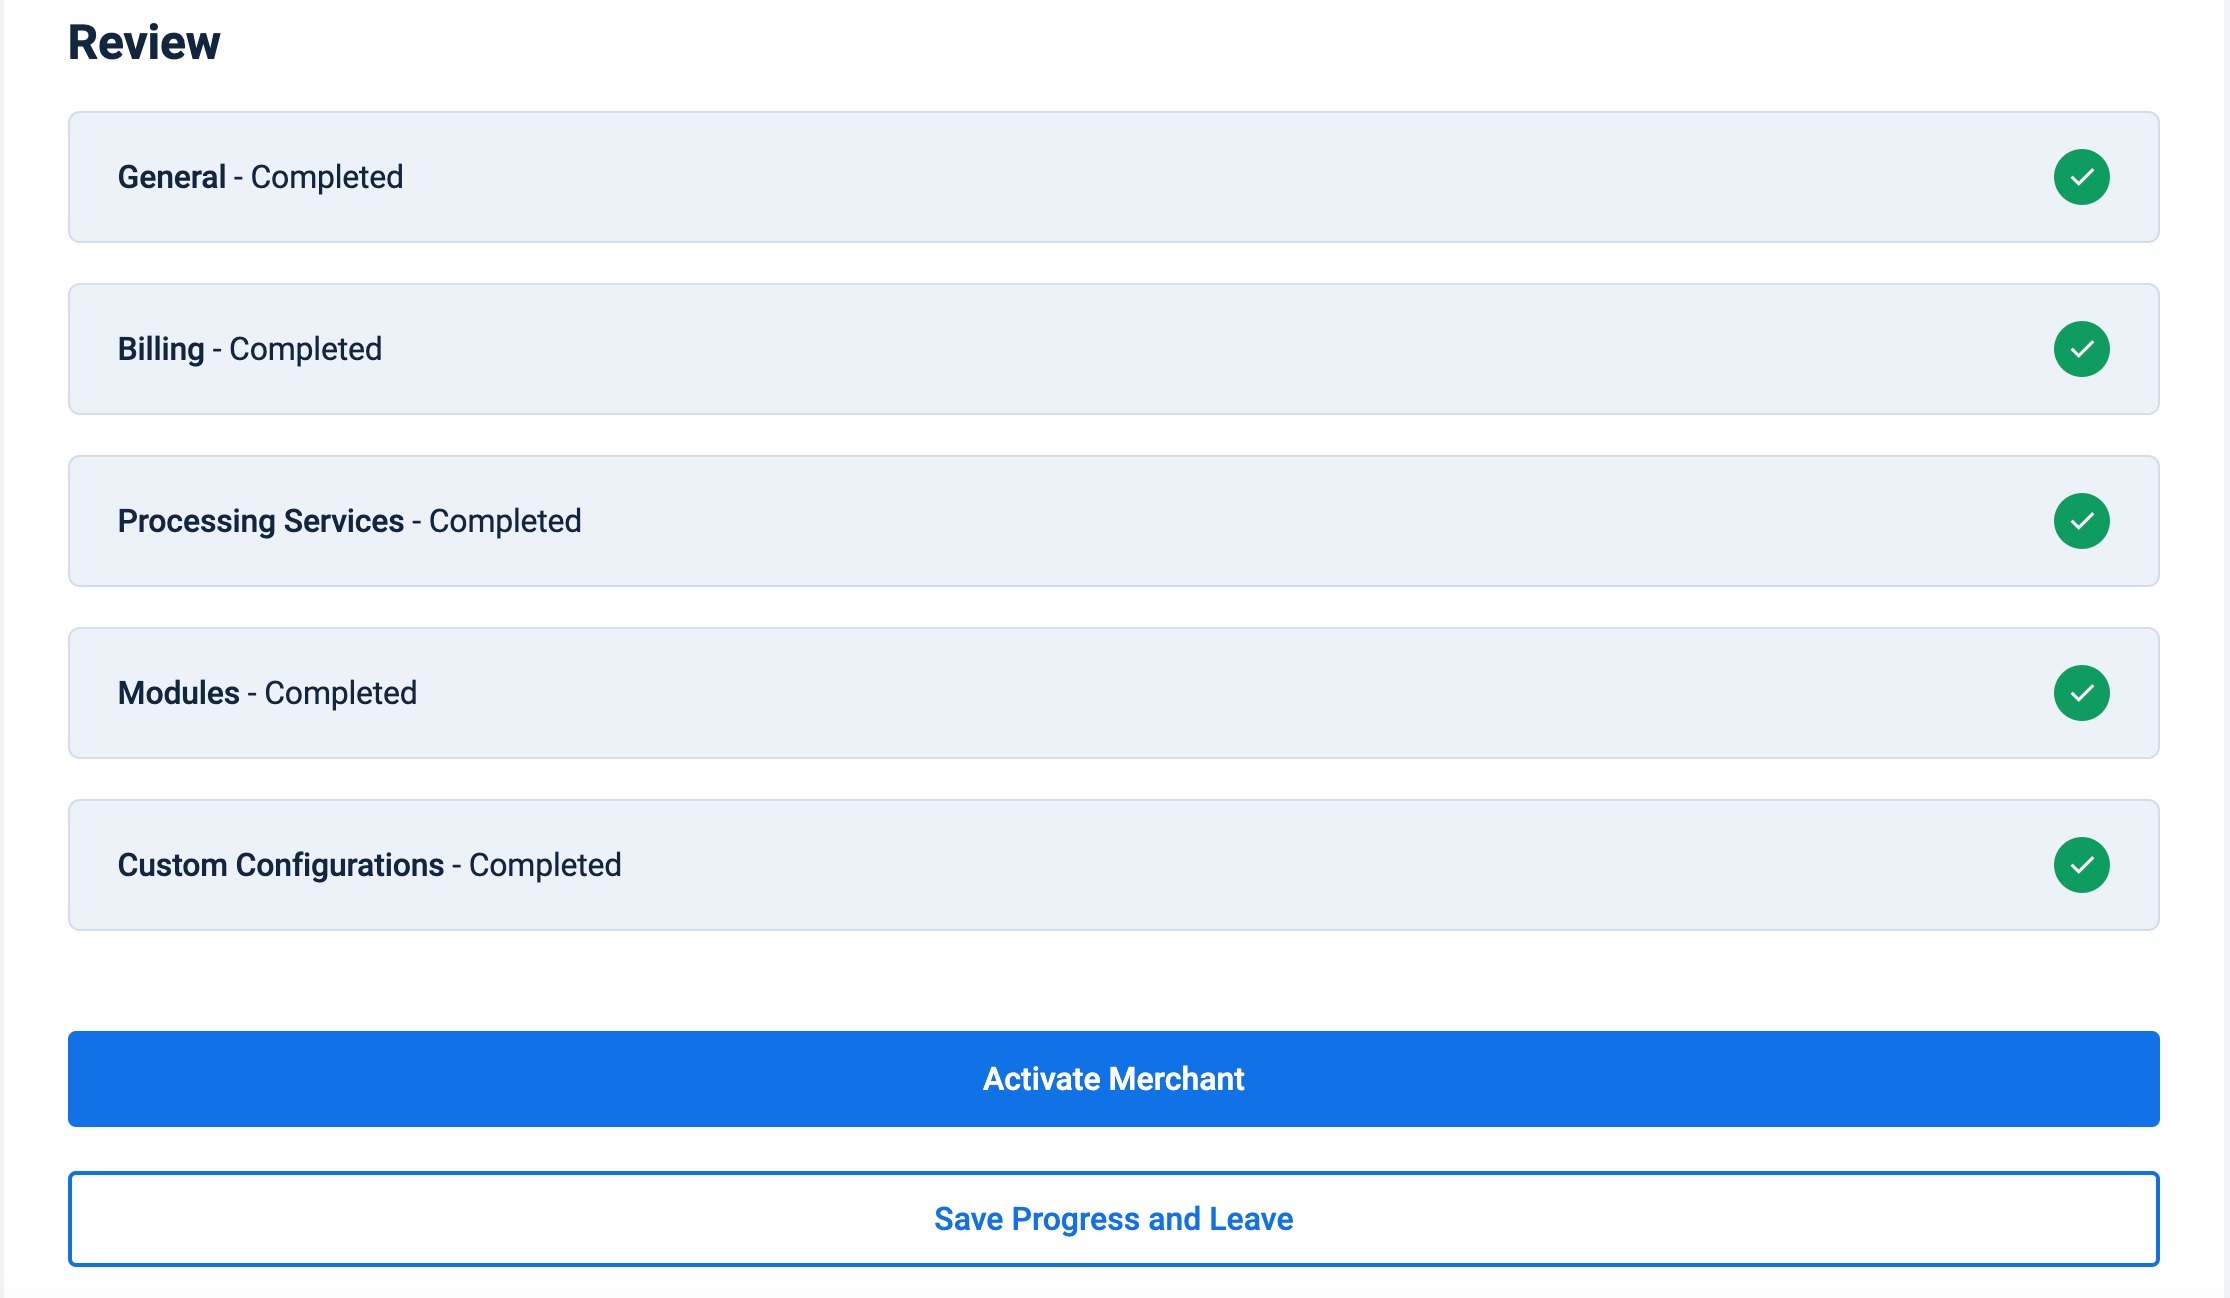
28. Once you are satisfied that what you have entered is complete and correct, click on Activate Merchant, which will send the Welcome email to the merchant.
Was this article helpful?
That’s Great!
Thank you for your feedback
Sorry! We couldn't be helpful
Thank you for your feedback
Feedback sent
We appreciate your effort and will try to fix the article